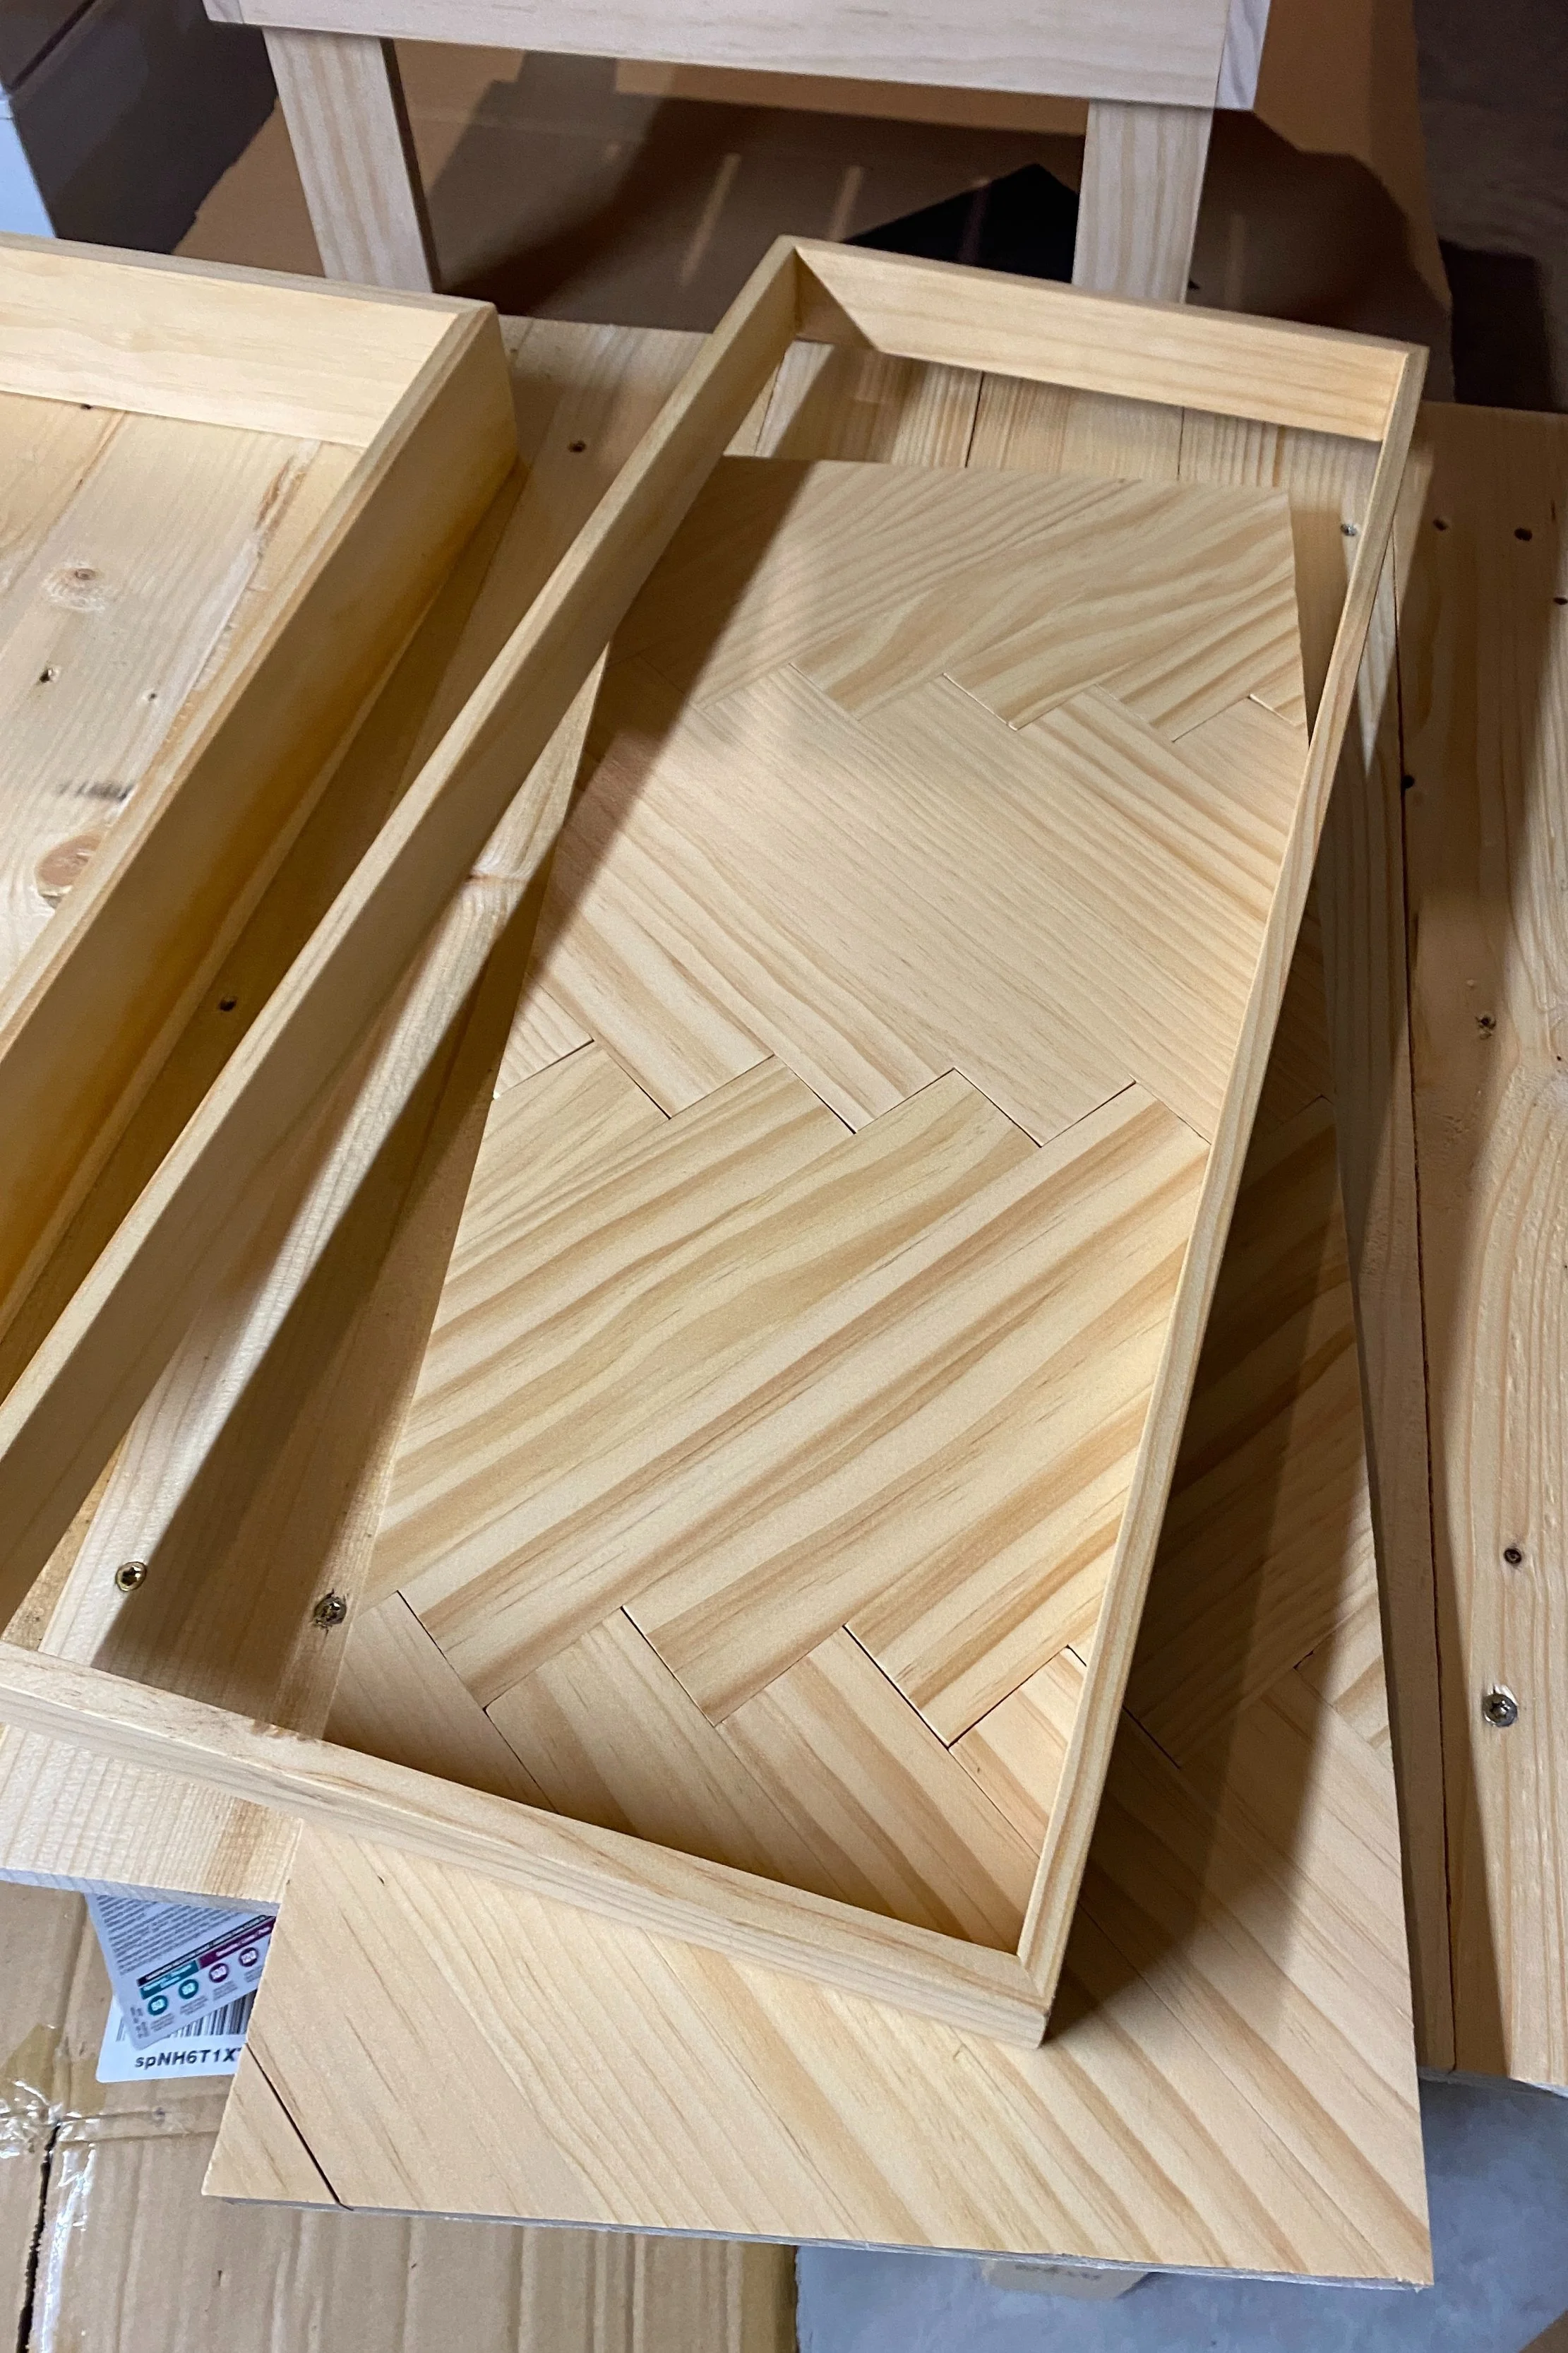
Herringbone Wood Serving Tray
These serving trays have become some of my favorite gifts to give to people; I feel like someone could always use one of these, place it in their home somewhere or enjoy, and then you are giving a handmade gift away, which always mean that much more! We recently made one for our neighbors, and when they saw it they said that we didn’t have to buy them anything, to which we replied that we made it, and they said they would’ve never guessed!
What I also love about this herringbone pattern is that I’ve used it for a lot of things. I’ve made a variety of these trays - different sizes and for different purposes, but I’ve also put this pattern on our headboard in our bedroom, and it turned out beautifully! Someday, I would love to use this for a piece of artwork or on a wall (maybe with our basement finish - hint, hint!)
Fair warning thought - this project is a little putsy. It has a lot of steps and a lot of waiting in between steps, so make sure that if you are giving it away as a gift, you start a few weeks before to make sure it is ready on time!
Cut your Base:
We always started with a sheet of ⅛” plywood as the base. You really only need something thick enough and sturdy enough that will be a template of your size and that you can glue your herringbone pattern to. Cut it to any size that makes sense to you. We have made ones that are longer & skinnier to be a decorative tray on our buffet table or down the center of our dining room table, we have made larger ones to be used as serving trays on a wet bar, but also smaller ones that you could place on a coffee table or end table. Measure it out, draw it out, do whatever you need, and then cut your base.
Draw A Line Down the Center:
Next, determine which way your herringbone will go - do you want it to be vertical/the long way down, or do you want just a short row going horizontal. Whichever way you choose, find the center of your board and draw a line down the middle from top to bottom. This will be your roadmap for when you place your boards.
Cut & Place Your Herringbone Pieces:
Next, let’s talk about the wood for your herringbone design. We have used a variety of wood thicknesses. At first, we used the pine 1” boards, but I much prefer going skinnier and have started using the ½” or ⅜” thickness for these, as you don’t really need anything thicker than that. We’ve also done many different widths; if you want something more intricate looking, use the 1” or 2” widths; if you want something a bit more chunky and subtle, use the 3” widths. You also could get pieces of any wood that you would like to make it with, or find thin sheets paneling or something like oak and strip them down to the sizing that you’d like - it will work all the same. I always say - whatever works best for your budget and the style you are trying to achieve.
After you have the center drawn, start laying down your pieces. How the centerline works is that you want to line up your tips with that line to make sure you are staying aligned (see picture for example). After that, determine how long you need each board to cover from the center of your patterns to the edge of your template plywood piece, give yourself a little extra of overhang and cut your boards accordingly until you have all the plywood covered in your design.
Rough Sand:
Next, I recommend doing a rough sand of all of the edges of your herringbone pieces to make sure they are all clean after cutting. Select the best sides of your wood pieces to be faced up and make sure to sand away any blemishes that you might not be able to sand off later.
Glue:
Now it’s time for the fun part: Glue! Have your whole design laid out in front of you and start from the top point. Put glue on the bottom side of your first piece, align it and stick in on your template. I always found it helpful to clamp the first two pieces (one on each side) to make sure they stay in place as you lay the rest of them down. Work your way from the top to the bottom, pushing the pieces in together as tight as they go. When you reach the bottom, clamp the bottom two in place to make sure they don’t slide off. Then it’s time for everything to dry - we typically let it dry for at least 4 hours since we cut on it pretty heavily in the next step, and most of the time leave it overnight. We used some of our weights from our dumbbells to place on the boards to help keep them down, but you could use anything heavy, like books, sandbags, or even some sacks of flour!
A little bit more!
Same pattern, just more intricate! I used the center line as a starting point and cut the first boards down the middle the exact same length and then continued the pattern off of the edges of those boards.
Make it Square - Cut it!


This is always the fun part because you start to see how it really is going to look. Flip your board over and around the edges, use some painters tape around all of the edges - half on your plywood board, and half on the edges of your herringbone boards. This will help avoid any splintering when you cut off the edges. Now, one side at a time, use a circular saw to cut off your edges, using the template as a guide for where to cut. It’s helpful if you have a straight edge that you can clamp to the base as a guide for your circular saw - measure out the exact width that your circular saw needs from the end of the base plate and clamp that baby to your herringbone board and a table or something to keep it sturdy while you cut. We always use a scrap piece of butcher block as our guide - it’s super sturdy and super straight (and didn’t cost us a thing!).
Then, one side at a time, use your circular saw to cut the edges off and watch your base come to life! After that, pull the painters tape off and give your board a look!
Sand It!
Now that you have your base, give it a nice sand with the orbital sander. When we did our most recent round of these, we had gotten a new orbital sander because our last one decided to die on us after 4 years of heavy use, and we found that if you don’t press down on the new one hard enough, it leaves all of these blemishes on the wood that are super prominent when you stain them (so we didn’t find them until we stained them - WAH). We had never seen this before (and we have sanded a TON of things), and we figured it out by the time the third tray rolled around, so make sure you are pressing hard and even with your orbital sander when you are doing this to make sure you have a nice, even finish.
Cut & Glue the Sides
For the sides, we have done taller sides to make it more an actual tray to hold things, and we have done lower profile sides for things like our buffet table board and a few heights in between. Determine how tall you want your sides to be and start with that width of a board. As far as thickness, I have found that the ½” thickness works the best - not too chunky, but sturdy enough to hold hardware if that’s something that you like.
For the corners, we have done 45 degree angles cut to meet up in the middle for a solid look all the way around, but we have also done a square meet up on the edges if you don’t have the ability to cut those 45 degree angles (or are scared to, which at one point we were). This is where it is important that your base is as square as it can be so you can cut the sides easily. Measure each side individually and cut boards accordingly. Then, dry fit the sides to make sure they will be able to adhere nicely around all 4 corners.
After you’ve confirmed a fit, you can glue it together a few different ways. I have glued each piece directly to the base - so if that’s what you have available to you with clamps, you go for it!
Jake has also just started gluing the frame together without the base, letting it dry, then gluing the whole frame to the base after it dries - either way works.
We have also started using a few nail gun nails to ensure a truly stable tray - this way, if someone did decide to use it as an actual tray (like to carry drinks or appetizers), it would be extra sturdy.
Stain & Clear Coat
After your tray is altogether, it’s time to stain it & finish it with a clear coat, or you could paint it - whatever you prefer!
Make sure the stain is fully dry before putting on the clear coat, and while we usually do 3 layers of clear coats for the sides, I prefer about 5 layers for the bottom since it will likely have some extra wear and tear.
Add Hardware
If you’d like to add handles, this is the finishing touch! Something that we didn’t do that I wish we would have is used painters tape where the holes are supposed to go so we didn’t have any splintering. You should put the painters tape on both sides of the board where you will be drilling your holes for the hardware.
Because of all the hardware we have been installing lately, we have started using a template for hardware - which, by the way, SO much easier than measuring a billion times to make sure your holes are the right width apart. You can find it here and it costs under $10. HUGE time saver and peace of mind! A few other pieces of hardware we have used you can find here. Make sure to get the right size/length of hardware for the tray and it has the look you prefer.
Instead of hardware, you could also string through and knot some thick jute rope if you prefer that look, and I’ve also wanted to try leather handle hardware as well - which would give it a completely different look - but I think would be really cool! If you have low profile siding, you likely won’t put handles on and that’s ok too!
That’s It!
Just like that, it’s done! Like I said, a little putsy, but turns out great. I feel like you see these everywhere in stores and it’s a great gift to give, and it means that much more when you hand make it yourself. If you make it for yourself, it’s so fun to make it the color, size and look that you want for your space.
If you end up making one - let us know! We’d love to see it!
P.S. We also did some personalization on some - added a last name as just a tiny detail using a cricut stencil - super fun!


